Why Spray Paint is the Key to my Success on my K9 Trapline
When I first started trapping all I never heard was wax and dye, wax and dye. If you were not waxing and dying your traps; all the old timers would tell you, you were wrong. This method has been a solid trap prep for years. Waxing and dying; protects the trap, allows for a clean and scent free surface, along with the wax helps to add speed when triggered. So why change something that is not broken?

Like most trappers, this is not my full-time job. I wish it was, but until that happens, I am running my K9 line before and after work like most people. That means I am on a time crunch! If I want to cover any kind of real ground with my line, SPEED is where it is at. Most of my traps I check from a truck. Most of the time I don’t even have to get out of the truck unless there is something in my trap or if it was fired. Someone asked me once, “by checking traps that way, don’t you miss a lot of prime spots?” My answer, “That is where the paint comes in.”
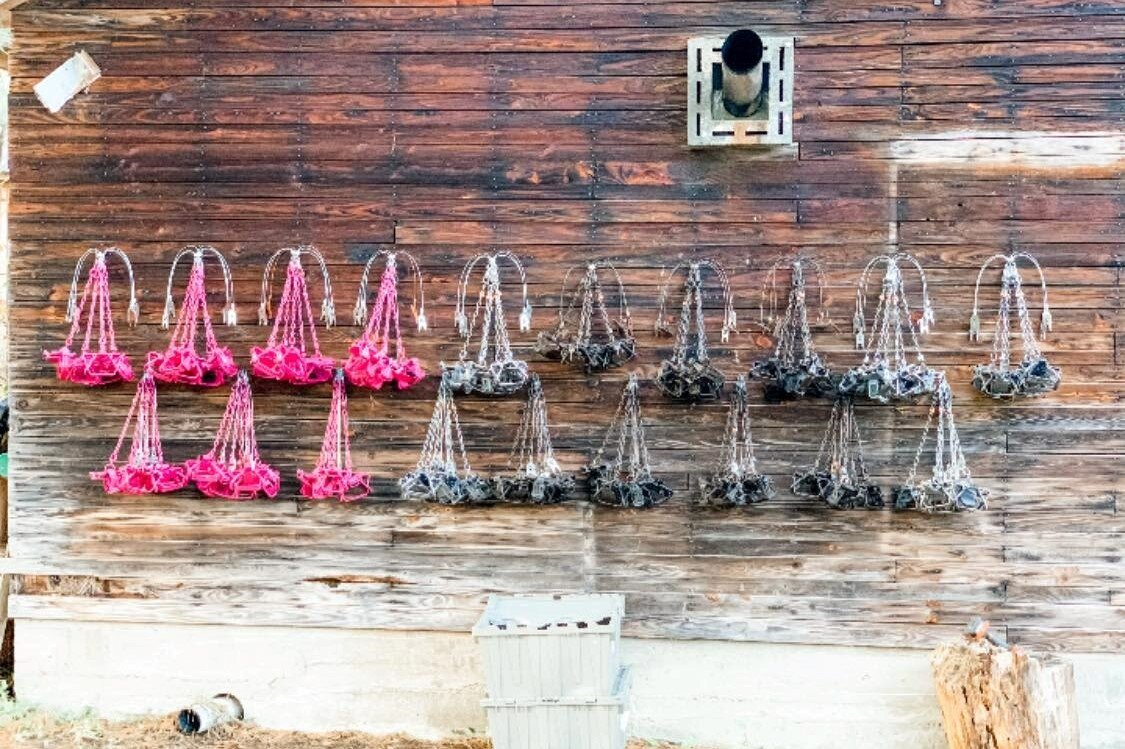
Anyone who follows my trapping adventures will see that all my traps are a bright pink! They standout and are pretty hard to miss, especially with a pair of binoculars. Painting my traps instead of dying allows me to accomplish 2 things:

1. I am leaving a scent free area for a longer period of time. In the trapping world “scent” is almost as big of a debate as Ford vs Chevy. Some trappers will tell you, if you leave your human scent all of the area K9s will stay away, and first/second night catches will never happen. Others will tell you it doesn’t matter. Those trappers will handle traps with no gloves, smoke while sticking their trap in the ground and so on. SO, which is right? Honestly, I have no clue! I am not a K9 so I can’t tell you, but what I can tell you is that if scent does matter, I got that covered. Where I live in NY, we are on a 24-hour check. Which means I need to make sure I have had eyes on my traps every 24 hours at a minimum. Because I paint my traps, I’m able to check them from greater distances with binoculars. Allowing me to stay away from the area and keeping it “scent free” as much as possible.
2. Remember when I said speed is key? I am 5.3’, I have little legs and “fast walking” is really not my thing. My trap line on any given day covers 50 –60 + miles and 30 to 40 traps in the ground. To get that in and still make it to work on time, I need to keep moving. Being able to drive by my traps is especially important. Painting allows me to set the backs of fields, tops of ridges and other areas that would have a “wax and dye” trapper walking. All I do is pull up to a clearing with a straight line of view to my traps and pull out my binoculars. This method saves me so much time and keeps me moving. I know that if I did not do this, I would be missing a lot of great locations for sure and the ground I cover would differently be less.
Now, I am sure at this point you have a lot of questions. One of them might be, “How do you go about painting your traps?” Answer, “have your husband do it!” I am just kidding, kind of! Although I am extremely fortunate to have my husband as my trapping partner and he is sweet enough to prep my traps when doing his. For the rest of you, the steps are pretty simple:
1. Picking your paint – we use Rustoleum 2X spray paint from Walmart. It is inexpensive but gets the job done. You are going to want to pick a bright color that stands out. Please keep in mind you are trapping in the fall, so your fall colors will just blend unless they are almost neon. So, I suggest you stay away from them. I also suggest you stay away from any deep colors like deep purples, blues, and greens. They seem to be harder to find as well. The purpose is speed here and spending a ton of time looking for your trap because it is blending in is not helping you. Colors that I found that seem to work the best are: Bright pinks, teal, lavender and even your hunter orange.
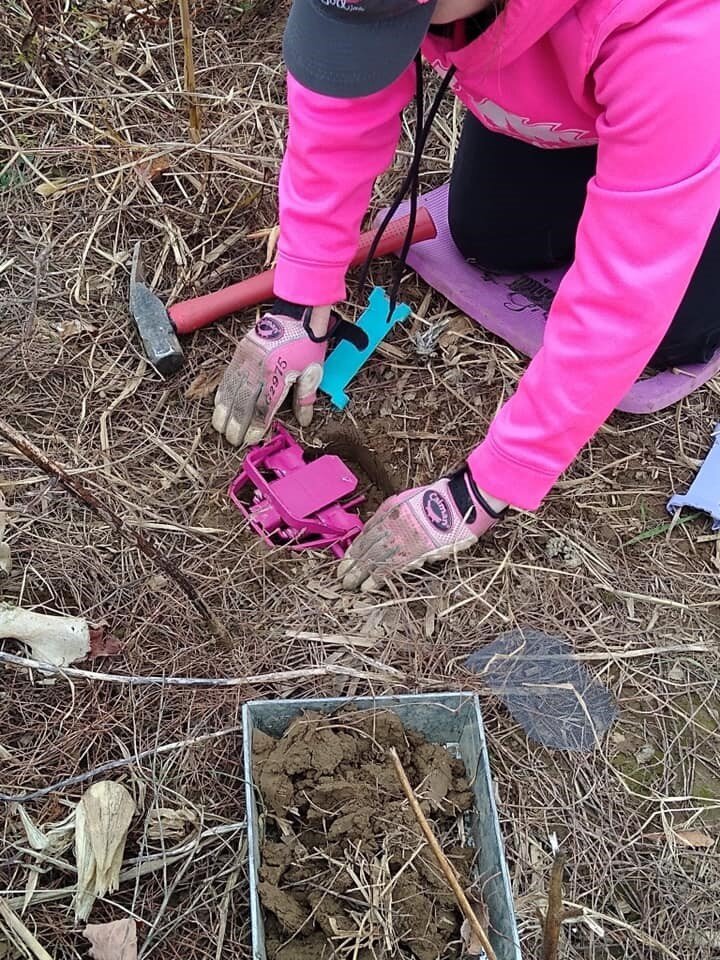
2. Cleaning the trap- if you are doing this with brand new traps. You are going to want to make sure you wash all the grease off the trap. I take mine to a car wash, but I have seen others use just a bucket with soap and water or even run them through a dishwasher (I don’t know how I feel about putting traps in my dishwasher, but it does seem to do the trick).
If you are converting traps that were wax and dyed the year before to painted ones, you are going to need to strip the trap. We normally do this in 2 steps.
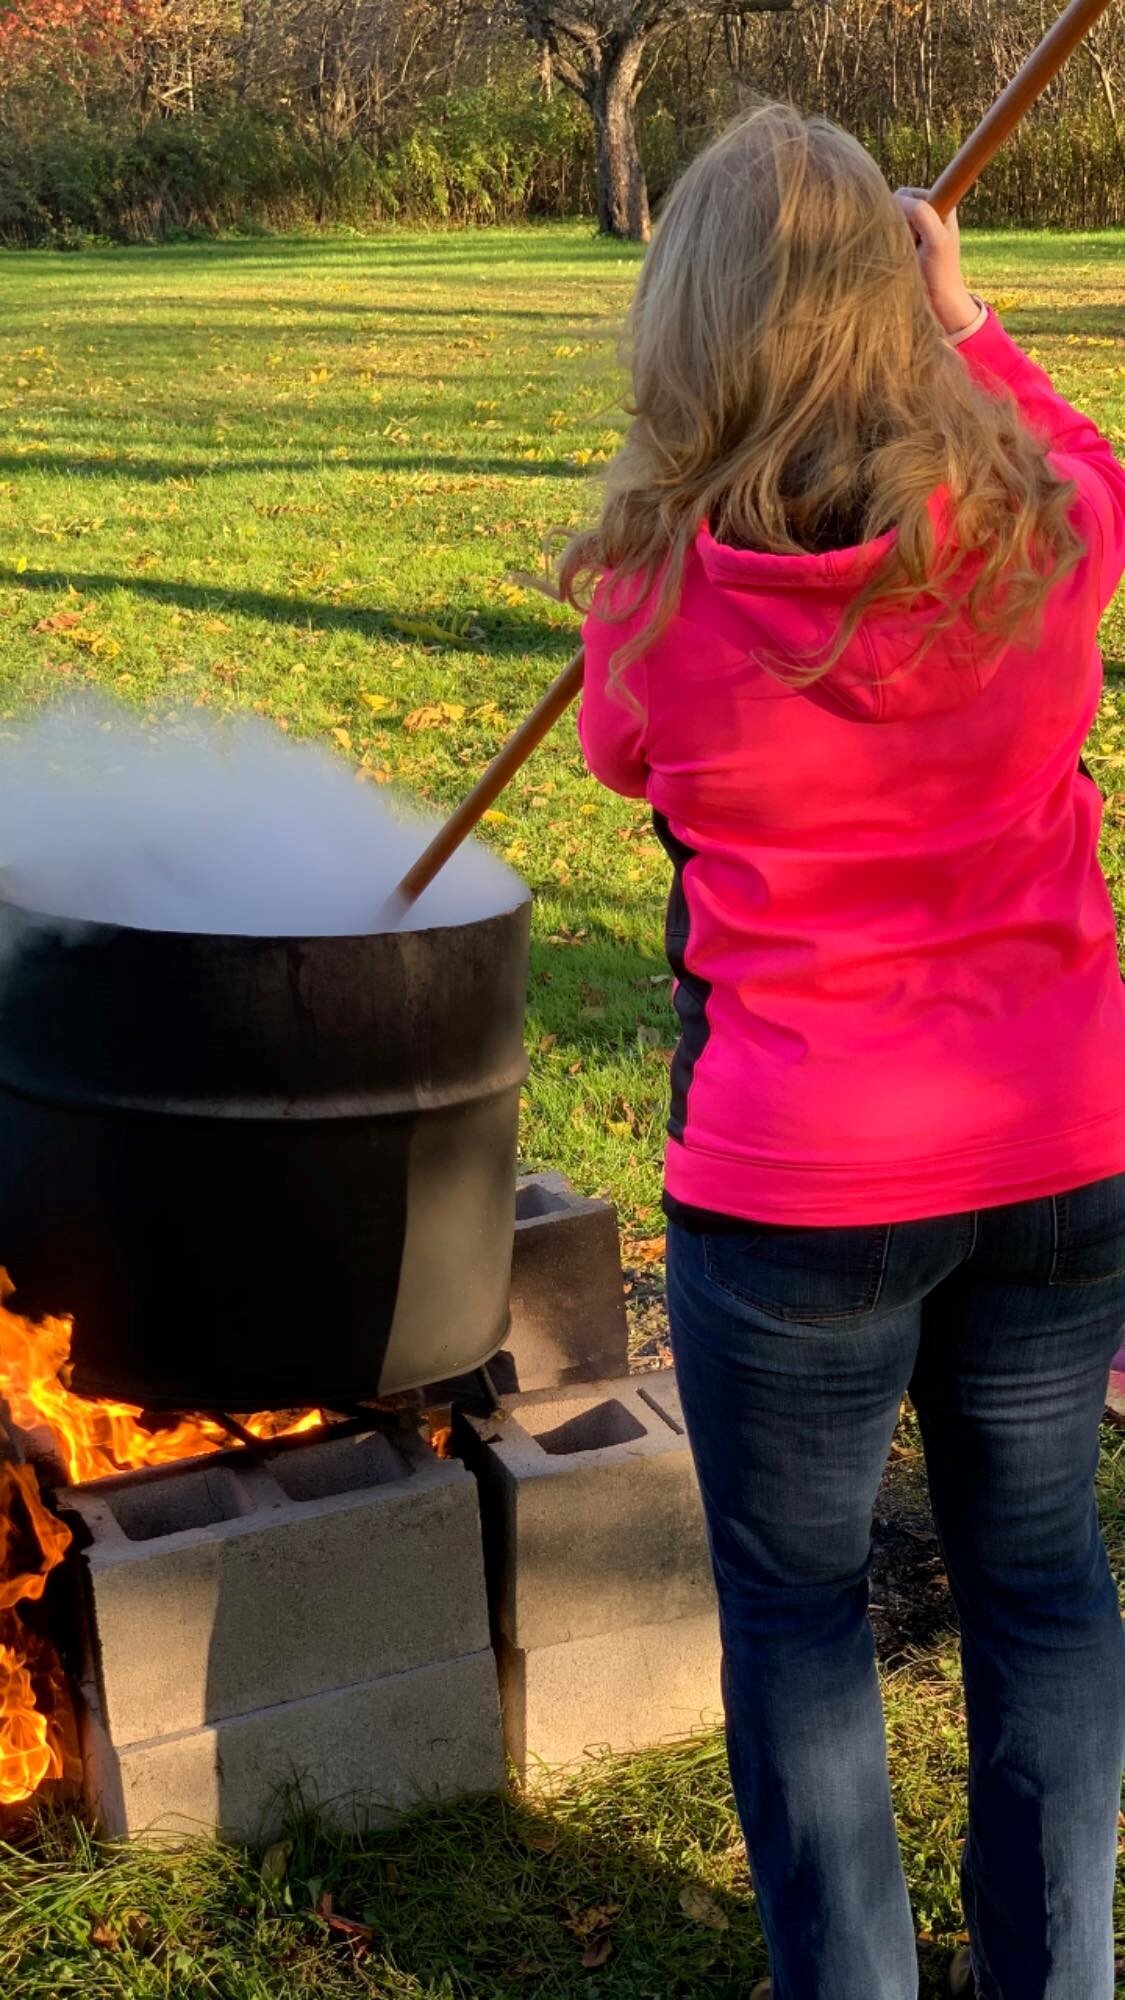
Step 1. Use a vinegar bath. Get a 5-gallon bucket and you are going to mix about ½ and ½. 1 part vinegar and 1 part water. Once that is mixed you will put your traps in there for roughly about 24 hours. Pull them out, spray them off with a garden hoes and then dip them in to another bucket with baking soda and water to neutralize the vinegar. Then hang to dry.

Once this is done you can move on to step 2. We use a product called Battle Born. You can find this product at www.sawmillcreekbaitandlures.com. We boil the traps in the mixture (Note, one can of battle born to 5 gallons of water, so when doing a lot of traps you will need more than just one can) to strip off any remining particles the vinegar bath did not get. This product will leave your traps looking brand new. Once that is done you are ready to paint.

**** Please note, we do this same process weather we are painting traps that were waxed and dyed or spray painted the year before.
3. Painting the traps themselves- Make sure your trap is dry and completely grease free. Any left-over residue can keep the paint for sticking or cause it to flake later. When painting, you are going to want to make sure the trap is completely covered and well coated. This means you will need to paint with a few different angles of trap and a couple coats. Do not forget to do the back as well.
4. Once the trap is painted, we let it hang outdoors for a good month or longer. The weather will alleviate any paint smell that might have be noticeable when first painted.
5. Once the trap has been “weathered” you can wax as normal and then it is time to stick it in the ground. Yes, I still wax, because it helps protect the trap from the elements and gives it some speed when triggered.
Other question I have had is: “Do you think you catch less fur with a painted trap?” Absolutely not! When that trap is in the ground the animal has no clue what color it is, if you dye or paint it, or that it is even there. I also have not seen an increase in dig-ups or misfires with this method.

Other question I have had come up is: “Do I see an increase of theft on public land with my traps standing out more?” I personally do not trap a lot of public land but the few that I do trap I have not had a problem on. A painted trap is more noticeable to you, but honestly, unless someone knows what they are looking for, I do not really think they see it. Also, you must take into consideration that the trap only stands out if there is something in it or it has misfired. If one of those two things has not happened, no one would even know it is there.

So, with that all being said, I hope you found this useful and that it gave you another idea on how to speed up the line. I know this has been a huge help for me and is truly my preferred way of prepping my traps for the upcoming season. If you have additional about trap painting, you can reach out to me on Facebook at Trapping Girl Inc. or in IG @trapping_girl_ . Good luck and tight chains.
Written by ReelCamo Girl ProStaff Linda White.